Using deCONZ Zigbee REST API for adjusting sensitivity of Aqara Vibration Sensor

The title is quite a mouthful, but the concept is really simple.
I needed to adjust the sensitivity of my Aqara vibration sensor, but there isn't a way to do that from the UI currently in either Home Assistant or Phoscon at the time of writing. Luckily deCONZ has a REST API plugin that we can use to do this!
This guide assumes you have a Raspbee I/II or a Conbee I/II using deCONZ/Phoscon working with Home Assistant and the Terminal & SSH add-on installed.
We're going to need to gather some information that we'll use to run the commands. It's all very easy though, so don't worry.
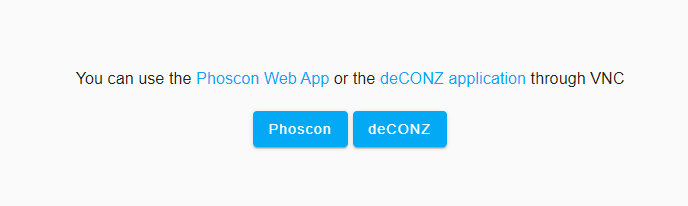
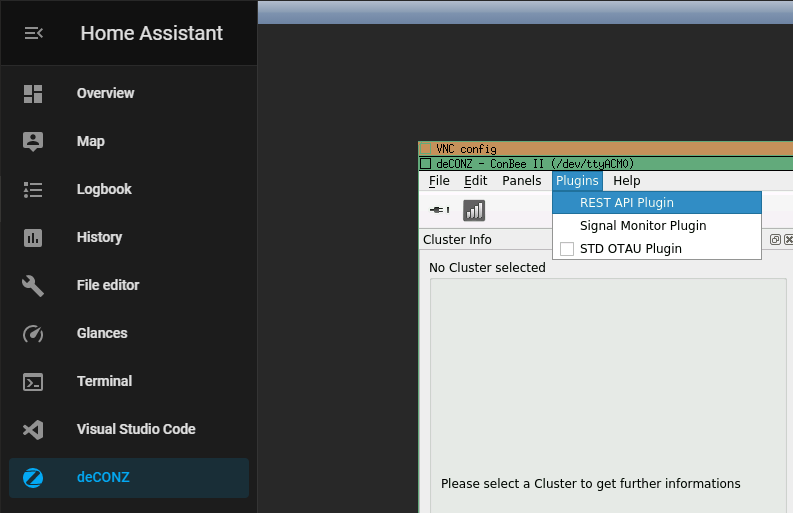
First up, you have to know where to interact with the API. This will likely be a docker container. We can find out the address and port in the deCONZ 'Plugins' section. So open deCONZ, then choose the 'deCONZ' button.:
Open the 'Plugins' menu and choose 'REST API Plugin'.
You will now have the address and port for the REST API!
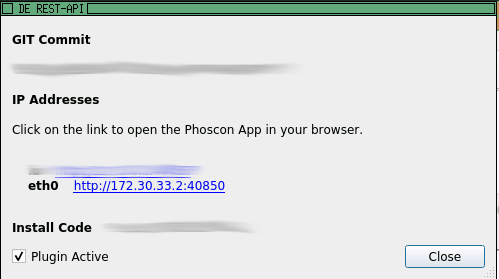
Armed with this info we can now get ourselves setup to use it with a little bit of curl magic. So over to our home assistant terminal now, we are going to type in the following...
(remember to replace my container ip and port with your own)
BUT, don't press enter yet!
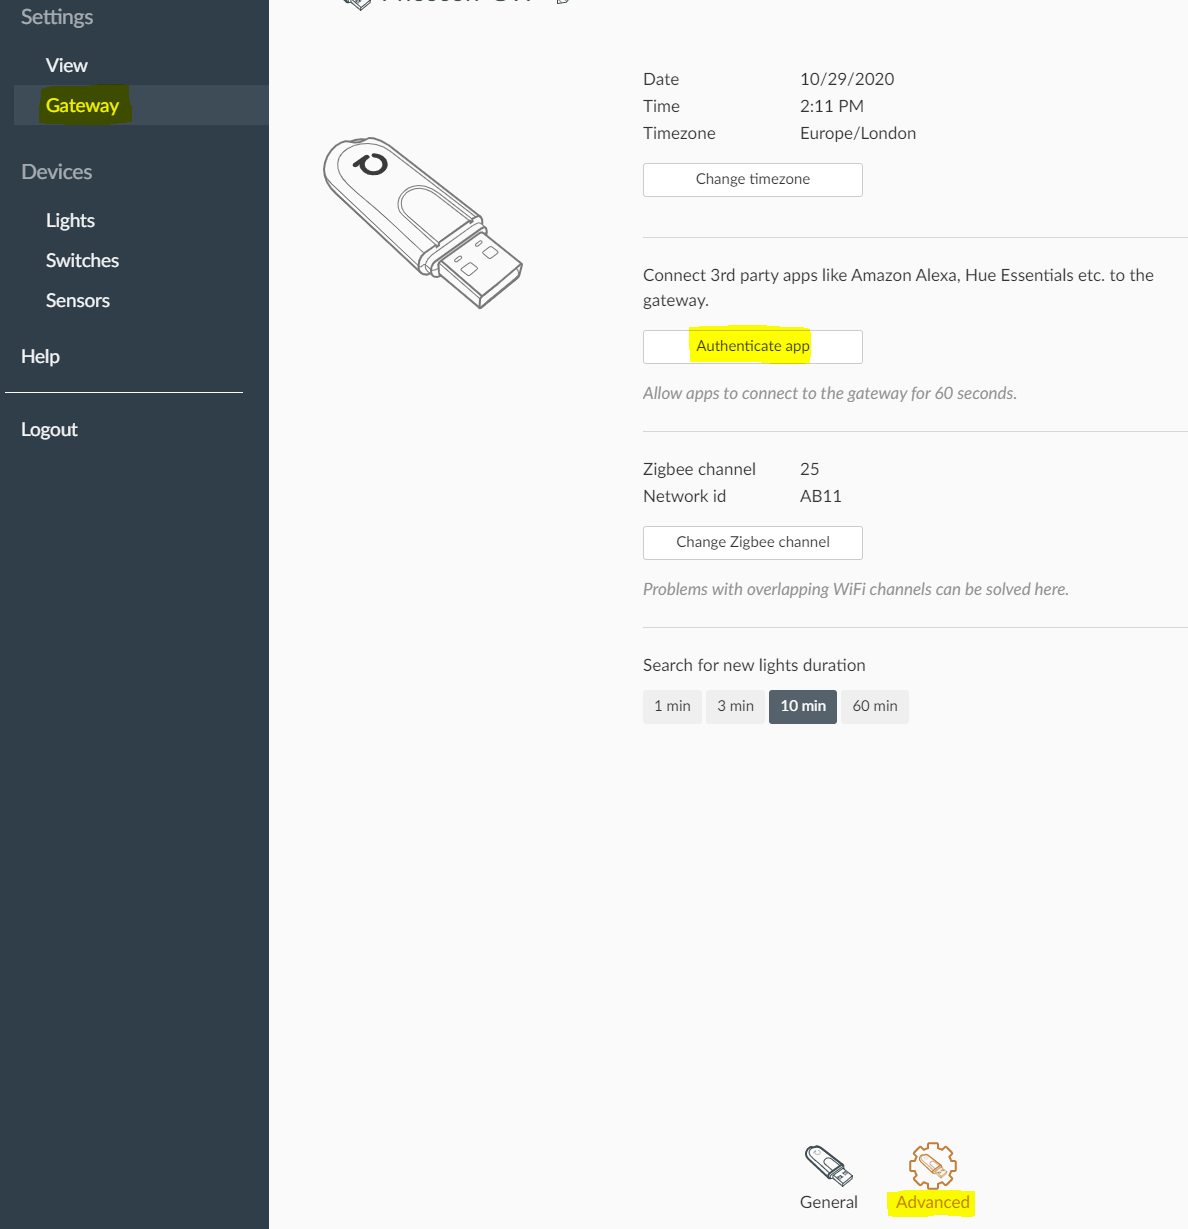
curl -X POST -d '{"devicetype": "terminal"}' http://172.30.33.2:40850/api/With that ready to go, you now need to swap back to deCONZ but go into Phoscon this time. You need to be in the advanced Gateway settings, like the image below, then click 'Authenticate app'. Once you have pressed that button you have 60 seconds to swap back to your HA Terminal and hit enter on that command we typed in.
Now your terminal is registered to interact with the API! You will have been given an API key in the returned information. It will be listed as 'username' and then a short string of letters and numbers. Record this as well, since we will need this next. For this example mine is: FDDA4762E9
There is one last piece of information we need to get before we can proceed and that is your entity id. This is a two digit number that is assigned to your vibration sensor. You can easily find this in Home Assistant by checking Configuration --> Entities and searching for your binary_sensor.vibration entity. This will have a number at the end of the name, in this example mine is called
binary_sensor.vibration_28
So my entity id is 28.
Now we can check this is correct using the API.
The structure looks like this:
http://[ip]:[port]/api/[api-key]/sensors/[sensor id]
So mine looks like this:
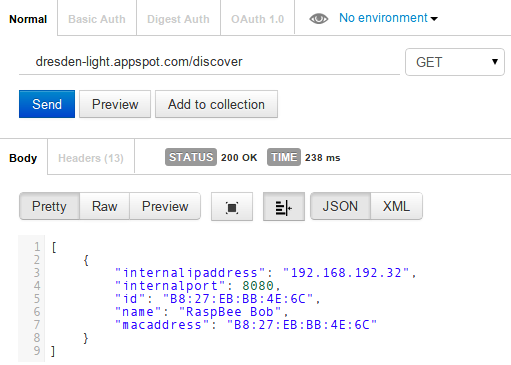
curl -X GET http://172.30.33.2:40850/api/FDDA4762E9/sensors/28Just substitute your values for mine in the appropriate places and you will get back all the information about your vibration sensor, including its current sensitivity value.
At last, it's finally time to change that sensitivity!
curl -H 'Content-Type: application/json' -X PUT -d '{"sensitivity": 1}' http://172.30.33.2:40850/api/FDDA4762E9/sensors/28/configThis will set your sensitivity to the most sensitive value and works well for detecting knocking at the front door or mail coming through the letterbox.
If that's proving too high for your needs, you can continue increasing the value up to a max of 21 for the lowest sensitivity.
Happy Automating!
Thanks to Dresden Elektronik for the API and their great documentation that helped me figure this out.